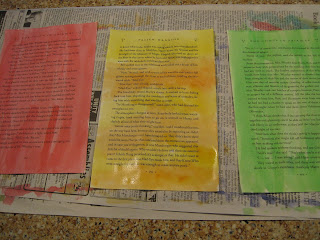
I continue to be intrigued with crafts made from books. I have seen paper roses for years and always wanted to try to make my own. I made a couple before with the template below without coloring the paper and they turned out great. This time I went for some color.
I found this template online. The flowers turned out fantastic. I recommend her website. She has tons more flower tutorials that I will probably try soon! |
| From Ellinee |
I bought some simple watercolors. I felt like I was in elementary school all over again. The colors were not the best but at least they worked.
I colored five pages, let them dry, taped them together on the sides and traced on the patterns. The water color did not bleed through so it was easier to trace on the backside of the paper.
To add some additional texture they recommend curling the edges. I did it by curling just like ribbon with a pair of scissors. To create the interior of the rose I used a bamboo skewer and curled the pieces around the center.
Once the center was done it was time for the bigger petals. I glued each piece together by the side tab. I took the smaller of the two pieces and glued the bottom and place it inside the large petal.
And repeat until all the layers are complete!
The end result is amazing! Each one is pretty different, especially the centers. I really love how the color did not pass through to both sides of the paper. It adds unexpected texture to each rose.
For now they are sitting in a pitcher. What I will do with them after that, who knows!


I'm digging the plain ones. They're so pretty! You could string them across a window, or piece them for earrings. Simply beautiful.
ReplyDeleteKate, thank you so much for commenting on my blog. I just found out that people were and how to reply! I'm glad someone is reading it. Earrings is a great idea. I was going to shrink them down anyways to make baby flowers for some bud vases so earrings are a very logical leap! Thanks for reading!
Delete