Showing posts with label upcycle. Show all posts

Sunday, March 31, 2013

Book wreath

I found this beautiful wreath online and thought it looked pretty cool.  I found some tutorials and off I went creating one of my own.
I took a used copy of Harry Potter and the Sorcerer's Stone.  The entire book.  It always hurts me to defile a book but it was worth it for the end result.  Plus it was a homeless book at a library book sale.  It will just be enjoyed in a different way.
I bought a medium sized Styrofoam wreath and went to work with paper, hot glue and staples.
I started in the middle of wreath.  On all layers but the first I only used hot glue.  Once I got to the layer that would sit on the wall I added a staple for some extra substance.
Once I made it to a flat back I flipped it over and started working again.  As I went along I used different folding patterns for various pages.  Some in cones, S shapes, and hearts.
Once I got to the inside on of the wreath I again secured the inside most layer with staples.  I had a couple extra sheets of paper in the end which I placed in any place where ever I could see the white from the foam wreath.  
 And it's complete!  Not to shabby for about a $5 project.
Another project complete.  I just need to make a second one for my mom.  Another day and another craft project to add to my list.

Saturday, March 9, 2013

Disneyland Paris Flowers

I've made flowers from books and Disneyland maps.  Since I started crafting more frequently with paper I've been collecting it from every place I go.  Now to put some of them to use.
I guess one of my biggest souvenirs I acquired along my European trip were Disneyland Paris maps.  I grabbed about 20 of them while I was in the park to bring home.  Let me tell you that all that all those paper maps ended up pretty heavy coming back home.
The map itself it really quite colorful.  Compared to the US parks maps it has a lot more color.  And it's a two in one map, both parks are on one sheet.
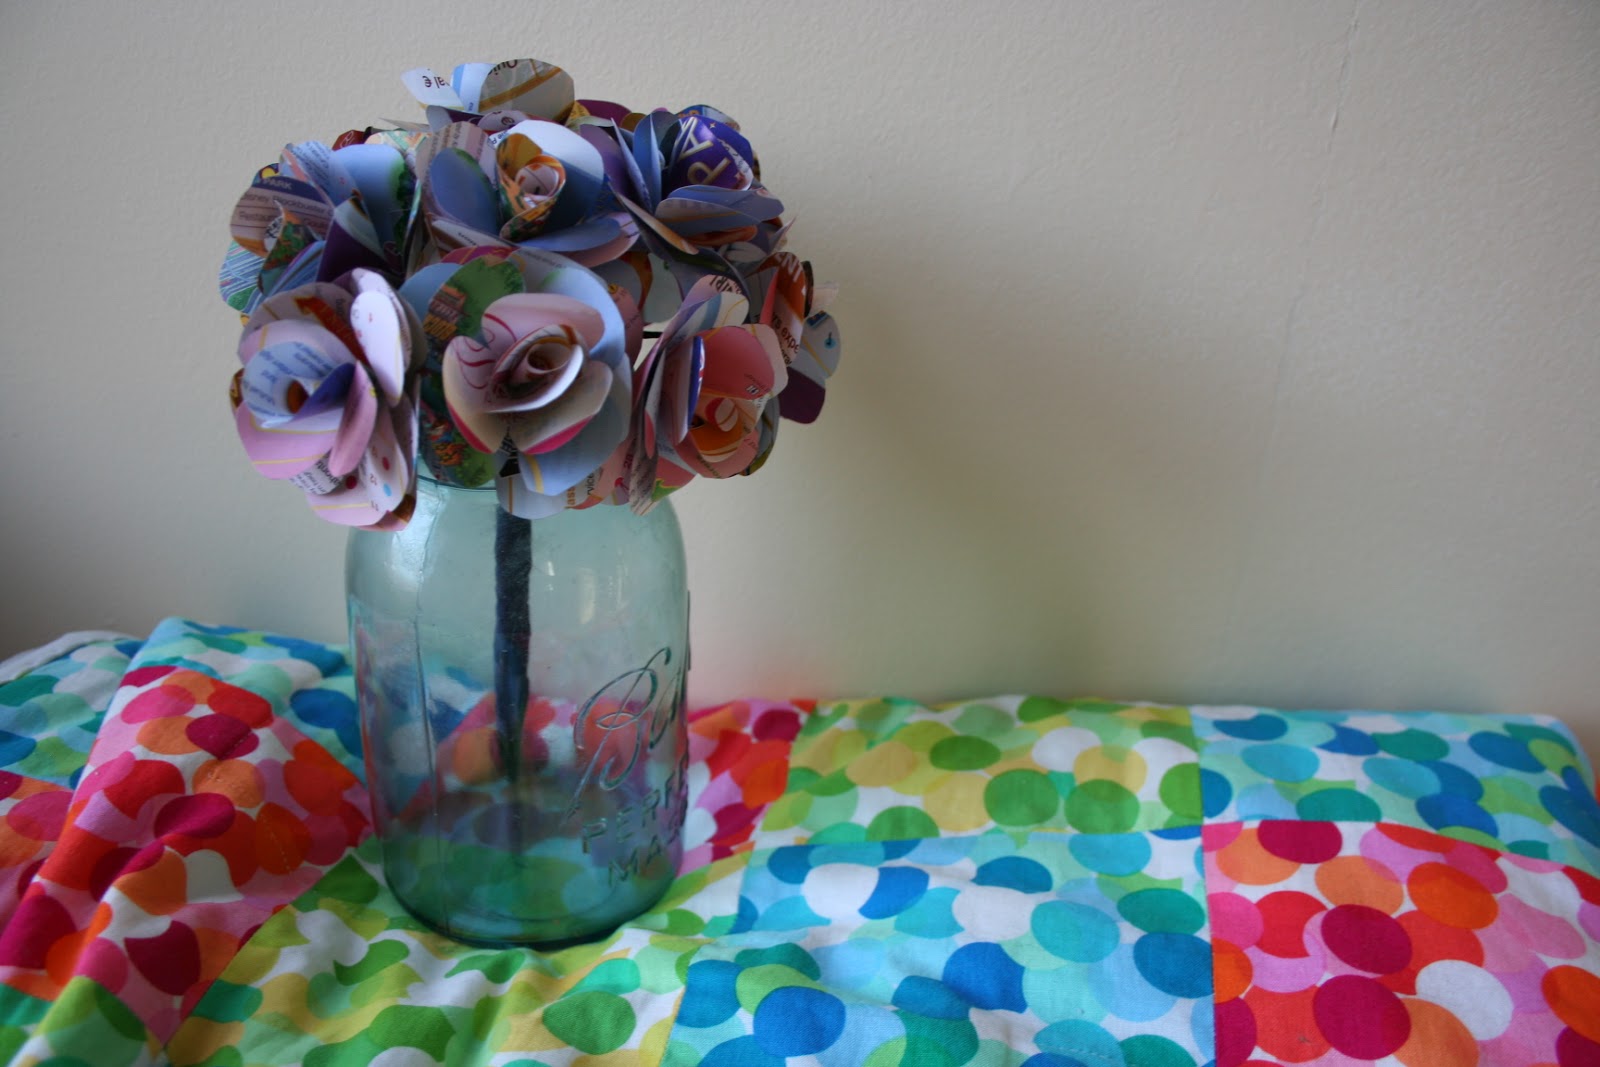
And now for the finished product.  These are my favorite flowers that I've made so far.  The colors are fantastic and vary so much on each flower.
I wrapped the stems first with floral tape.  It give them a much more substantial look and feel.  Then I gathered all the stems together and wrapped them with ribbon.  To secure the ribbon I used fabric straight pins.
Disneyland Paris Map Flowers
 What's not to like on how they came out.  
One map created this entire bouquet of 12 flowers.
Now to find them a proper place in the house.  
And to figure out what to do with the 19 other maps I acquired.

Friday, December 28, 2012

100th Post! Christmas Ornaments with Wedding Flowers

Hooray, it's taken me about 18 months or so but I've made it to 100 posts!  100 projects, probably not but for sure 100 posts!  That's kinda cool.
Well anyways onto today's craft.  I've been in two weddings over the last year and a half and I dried the flower bouquets.  Since I was already in the mood to make ornaments it fit for my next project.
One of the bouquets had tons of different flowers so I wanted to make sure to get all the color and texture.  I slowly took the ribbon off, found out a lot on how professional bouquets are made, and cut it apart.  I discovered quickly that I would not be able to get the leaves in without breaking them.  I suppose if I did it with fresh flowers they would go in whole.
 Once all the pieces were inside I took the ribbon from the stem and made a bow on the top.
 I did the same with the baby's breath bouquet.  These went in a bit easier.  I kept the baby's breath on their stems as well as I could.  I cut off stems that had many blooms still on them.  They seemed to float inside the blub.
Both brides really loved them.  
And I made some for me too.  They are a part of my life too and a nice reminder every holiday season.  Merry Christmas to all and a Happy New Year.  And Festivus for the rest of us.

Saturday, December 22, 2012

Origami Cranes ornament

Continuing with the Christmas cranes projects.  Last year I made glass bulb ornaments with Disneyland Maps curled inside.

This year my ornaments have origami cranes inside.  I made all the cranes in high school and they have been sitting in a Lord of the Rings tin for many years.  Now that The Hobbit is out in theaters it was time to open my Two Towers tin.  I made tons of them over the years.  There were about 10,000 inside so I had plenty of cranes to choose from.  

I picked out many different papers and put them inside the ornaments.  I decided to put cranes in the ornament from the same paper inside.  Some were green, some were pink, some white, some were made from wrapping paper, some from Andies mint wrappers.  I kept one with a music score.
I'm glad I kept all those cranes over they years.  Now to figure out what to do with the 9,000 cranes left.  
Make 9 wishes?

Wednesday, December 19, 2012

Christmas Crane Garland

So over the years I have made thousands of paper cranes.  I've made probably 15,000 and I don't think that it much if at all of an exaggeration.  I made most of them in high school and since them they have been sitting in tins in our basement.  And this year I had a couple ideas of what to do with them.
Again please forgive me for the bad photos.  I almost always work on/finish my projects at night and need a flash to take photos.
I started with an idea.  What about using my Starburst cranes to make garland for my Christmas tree.  I started pulling the colors out that I wanted and started to notice it was going to be a very difficult and long process unless I divided up my entire stash.
Like many of my other projects I got in a bit too deep!  I had so many different red ones that were almost impossible to tell apart.
 I took about 2 1/2 hours to divide up all of the cranes.  It was worth it.  So much simpler to find all the different colors!
Once separated I split into small colored piles.  I used 6-10 of each color.  I had 18 different colors.  Who even knew that there were even 18 different flavors of Starburst!  
From there I used a needle and hand quilting thread to string them together.
 I'm very happy with the result.  It adds a lot of extra color to my Christmas tree.  And I hope that those who receive them for Christmas gifts like them too.
So all that time in class during high school that I was making these instead of holding my complete attention was well worth my effort.  It only took me about 10 years to figure out what to do with them!

Monday, May 28, 2012

From book to coaster

It's time for another craft made out of books!  I ran across a picture of coasters that were made out of book pages and I knew it was something that I needed to try. 
I started experimenting with page sizes to create at 4 inch by 4 inch coaster.  I ended up cutting each page 4 inches by 3 inches.  2 inches was too thin and 4 inches was too thick.  I used a bamboo skewer to roll each piece.
 When I had rolled about 2 inches of paper onto the skewer I spread glue on the remaining paper with a glue stick.  Another flashback to childhood, using a glue stick.
 Continue rolling you paper until it fits snugly on the skewer.  I found that putting a healthy amount of pressure once it rolled up helps keeps the ends together.  I might try using rubber cement next time.  The glue sometime came apart.  
After sliding the piece off the skewer I put two rolls of paper together with bobby pins.  I painted on Mod Podge on the top once I had selected the best part of the roll to face the top of the coaster.
 I only found 10 bobby pins in the house so this part of the project took a long time.  If you have more bobby pins you might be able to glue it all together at the same time.
 Finally it's all together.  I did an extra coat of Mod Podge on the top because of the liquid that could get on them.  Once the top was dry I flipped it over and did a layer of Modge Podge on the back.
 Ta Da!  4 super cool, upcycled, unique book coasters.
Harry Potter pages coasters
 With my projects so far I've made it though about 1/4 of my book.  So many more project ideas are just waiting to move from my mind into reality.

Saturday, May 26, 2012

From books to flowers

I continue to be intrigued with crafts made from books.  I have seen paper roses for years and always wanted to try to make my own.  I made a couple before with the template below without coloring the paper and they turned out great.  This time I went for some color.  
Harry Potter roses
  I found this template online.  The flowers turned out fantastic.  I recommend her website.  She has tons more flower tutorials that I will probably try soon!
From Ellinee
I bought some simple watercolors.  I felt like I was in elementary school all over again.  The colors were not the best but at least they worked.
Harry Potter paper roses
  I colored five pages, let them dry, taped them together on the sides and traced on the patterns.  The water color did not bleed through so it was easier to trace on the backside of the paper.
 To add some additional texture they recommend curling the edges.  I did it by curling just like ribbon with a pair of scissors.  To create the interior of the rose I used a bamboo skewer and curled the pieces around the center.

Once the center was done it was time for the bigger petals.  I glued each piece together by the side tab.  I took the smaller of the two pieces and glued the bottom and place it inside the large petal.
And repeat until all the layers are complete!
The end result is amazing!  Each one is pretty different, especially the centers.  I really love how the color did not pass through to both sides of the paper.  It adds unexpected texture to each rose.
 For now they are sitting in a pitcher.  What I will do with them after that, who knows!