Showing posts with label sewing. Show all posts

Tuesday, January 15, 2013

Baby quilt déjà vu

It seems a bit a déjà vu.  This quilt looks offley similar to another one I made.  And for good reason.  It's version 2.0 of the baby girl lattice quilt.  I finished the top a year or more ago.  Now it is finally complete and off my to do list!
Some baby girl will love this quilt.  The pink back makes a great frame for a girly quilt.  But as I am not one myself, it doesn't make it too girly, but enough.
 This quilt features the warm colors from the color wheel and green.  Green seems bend either way for baby quilts, clothes, decor, etc...  I love green, especially when it leans towards teal, and it completes the rainbow pattern within the size of the baby quilt.
It feels so good to mark a project off my list, even if it wasn't written, it's a weight off my mind!  

Friday, January 11, 2013

A Lattice baby girl's quilt

As many of my projects go it take me a very long time to complete an entire project.  I'm superb at finishing the top of quilts but it takes me a bit longer to finish them completely.  But I'm happy to report that I've been on a roll lately.  So at least the next seven posts are completed projects!  I'm so happy I would be jumping with joy if it weren't for the need for me to be still to type up these blog posts!
So here we go with the completions!
 My first project finished was a baby quilt.  I actually finished three but gifted one of them to an expectant mom before taking a photo.  Once of these days I will get better at that too!
Like many of my projects I finished the top of it ages ago!  This quilt is no exception.
 I hand quilted the top, batting and back all together and then hand turned the edges.  Outside of the construction of the top everything else I did by hand.  I'm getting a good callus on my quilting finger now!
I love how this one came out.  It doesn't scream girl but it defiantly leans that way, especially with the purple backing.  I might have an order for a baby girl quilt or two here soon so I'm glad that I have some back stock ready.


Friday, January 20, 2012

Valentines day pillow

The day after breaking off the relationship I couldn't just sit around.  I had to do something.  And something that comes naturally to me is working on crafts. 
Valentine's day is around the corner so it would be the easiest crafts to make.  After breaking up hearts are not quite the items you want to be working with but I did it anyways.
I found a piece in my parents house that inspired me to make a patchwork pillow for Valentine's day.
heart pillow
 Blogger decided to change all my pictures sideways, oh well.  I went to my fabric stash after buying some fabric from one of my favorite fabric shop in Lawrence, KS, Sarah's and starting cutting the ever popular 2 1/2 in squares. 
heart pillow
 I started to draw out some different patterns.  I originally planned to use diamonds as a pattern for the pillow but the different angles of the heart precluded that idea.  I decided to go pretty simple and go from there.
heart pillow
I took a good amount of time laying out the initial shape of the heart with one fabric of the four that I had chosen.  
heart pillow
To continue tomorrow.  Crafting make the heart grow stronger!
- Bryn

Saturday, December 31, 2011

1/8 of the project done, if that

Making progress right?  Slowly but surely the quilt is coming along.  
Triangle fall quilt
It starts in stack, goes to rows, rows to sections, sections to a whole quilt.  So many more rows to sew
Triangle fall quilt
 This is week is the busiest week at work and I'm sick to boot.  I won't get a chance to do much more today but hopefully in the next couple of days the quilt will come along.
- Bryn

Wednesday, December 28, 2011

It's been too long!

Wow, it's been over a month since my last post.  Needless to say, the holidays have been crazy!  My mom visited from KC, my aunt and uncle visited from Idaho and Colorado and it is the busiest time at work of the entire year.  And now I'm sick!
My projects got a little mixed up for the holiday season.  The quilt I wanted to make in the fall is my project now and my Christmas presents I did in the fall.  But I suppose, better late than never!  A while ago I found a picture online of a quilt made of solids and triangles.
Triangle fall quilt
I thought it was beautiful so I decided to give it a try.  I bought a whole bunch of solid colors from this crazy store in Anaheim.  I have never seen so many fabrics in one place in my entire life!  But I digress.
Triangle fall quilt
Opposite all colored pieces I bought a charcoal solid.  I really wanted to challenge myself to make something different than I usually do.  Most of my projects lately have had a light muslin or white as the background color but for fall charcoal seemed to suit the season better.  
Triangle fall quilt
I made five inch squares and cut them diagonally.  I used four yards  I found a little trick earlier this year of not separating the pieces until I had sewn thirty to fifty together and then cutting them apart.  Seems to work well and saves me a lot of thread.
Triangle fall quilt
I ended up with about 25 different colors.  Some of the colors ended up a bit too bright so I didn't use them.      More cutting, ironing, and sewing to come.  Feels good to start another project.  More to come soon!
- Bryn

Tuesday, November 15, 2011

Organizing my mess

I can't throw away even the smallest pieces of fabric.  If it is a long skinny piece that is about an inch wide, kept.  A one inch square, kept.  I keep almost every scrap.  It's a problem I have.  But I can make amazing things from those tiny pieces of fabric!
 Needless to say, when you make a million different projects you get a lot of scraps.  My box was a mess!  I had a little time before work and that seemed like a perfect project.
 I put all the similar colors together in separate piles.  Once I had all the pieces together I rolled the colors with a rubber band.  Awesome!  All my scraps fit in the box again!
Finally being able to find all my scraps will make putting together projects much easier.  After the holidays I plan on doing a scrap project to get rid of my stash.  

Today is the day I go back to working on the black and white quilt. 
- Bryn

Sunday, October 30, 2011

Christmas presents with scraps


 My Christmas stockings left me with a ton of left over fabric that was already sewn together.  I've had a Chrismtas pillow on my project list for a while.  It dawned on me that my scraps would be perfect for those pillows.  There is no time like the present to make presents!
For each 16" pillow I cut a 8 inch square white piece of fabric.  I needed more white fabric on the outside to create a diamond shape.  Two - 8 1/2 squares for the sides of the pillows and cut them once diagonally to create two large triangles.
I cut 2 inch wide pieces from my last project and framed in 8 inch piece.
 I pressed out the seems and added my other pieces of white fabric on each side.  I had 4 square pieces of fabric with a colorful border along each edge.
I sewed on the large triangles on each side of the square to reorient the fabric square in the center to create a diamond instead.
All that hard work left me with a beautiful diamond pillow top.
That is all I can get done today.  It's time to head to work.  Tomorrow I plan on using even more scraps for more pillows and other projects.  
- Bryn

Saturday, October 8, 2011

Creating Rapunzel

I have wanted to make my own Halloween costume for the last couple of years.  This year my craftiness gene has kicked in at the right time.  This year is the year for Rapunzel.
I have been buying fabric for a couple of months.  I still wish I had other choices of purple with pattern in them but beggars can't be choosers.
Rapunzel cosplay
I have not made clothes in a very long time.  I first made the bodice from muslin to see if the shape was right.  The muslin bodice looked pretty good so I made the real one.  I reenforced it with some interfacing but it was a little too stiff.  I ended up keeping the interfacing on the back but took it out of the front.
Rapunzel cosplay
The basic look
Quite a few steps later - putting in the zipper, finishing the top seam with lace, measuring eyelet holes and placing them, and weaving the pink string.  Lots of stuff!
Rapunzel cosplay
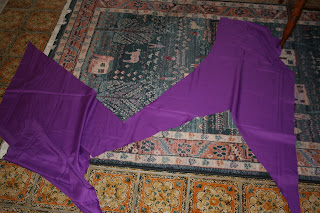
 I moved onto the skirt.  I decided to try and make it without a pattern.  I used a skirt that I already had that fit me really well and had the shape that I wanted for Rapunzel.  I had to use two different purples to create the top and bottom layers of the skirt.
Rapunzel cosplay
I call it - The Art of Cutting
All the pieces together.  The skirt on the left, bodice in the middle and my last little project on the right.
Rapunzel cosplay
The almost finished product!  Looks pretty good for not making clothes in a really, really, really long time!
I do have quite a few things lift to actually finish it.  
  • The bottom seam on the bodice
  • The top and bottom seam on the skirt
  • A redo on the opening on the skirt - it's too big for my taste
  • Adding sleeves to the bodice
  • Painting flowers on the skirt
  • And my final project - Flynn's satchel for my Trick or Treat bag!

Wednesday, September 28, 2011

Coin change purse gone bad

 I wanted to make another little bag to use for various things.  I found this tutorial here and gave it a try
red zipper bag
Red scraps
Around the edges it required a double bias tape.  Basically that means you iron a piece of fabric twice.  Once to turn in the bad outside edges and another to have good edges on both sides of the fabric.
red zipper bag
Double bias tape

red zipper bag
Double bias tape all 
around

red zipper bag
Pinned on - looks kinda artsy
 Frankly I am a little disappointed that it didn't turn out better.  If I still don't like it in a couple of days say goodbye to the zipper and it will go to another project!
The finished product
The inside zipper is too long.  I could cut it off but I don't think it will.
Well it's another project done and another project for tomorrow.

Monday, September 26, 2011

Fabric Bag

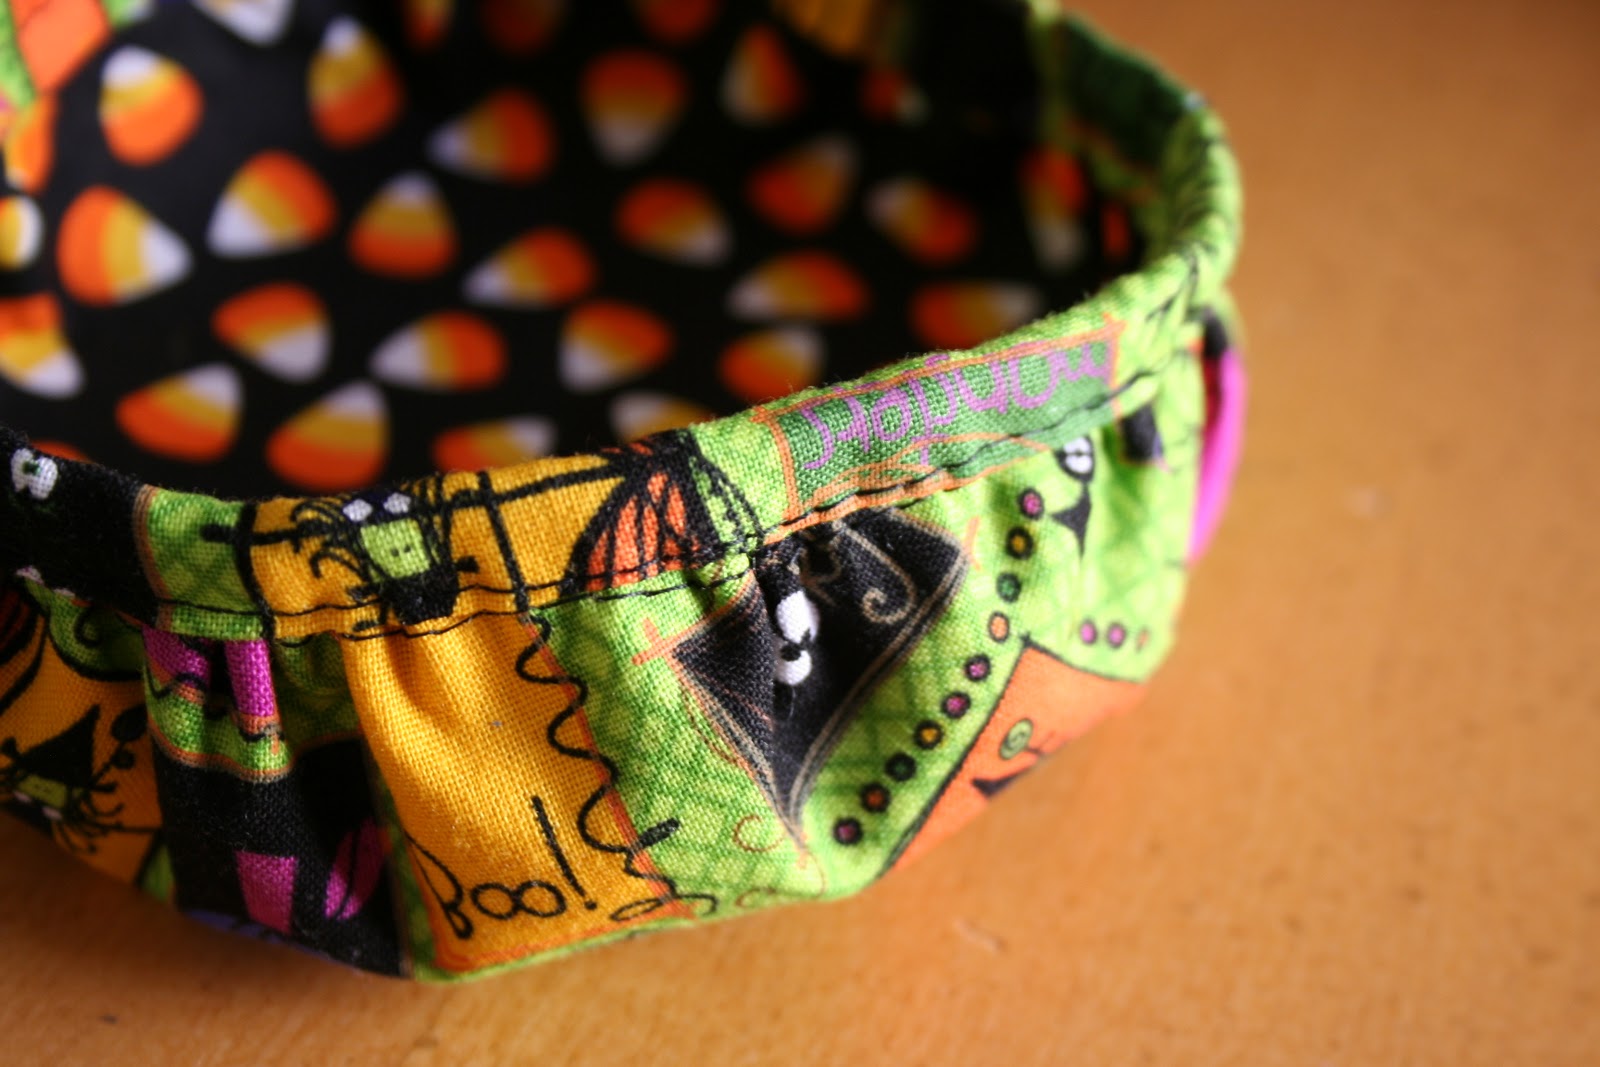
I found another cute tutorial online for a fabric bag.  Gathering fabric... I haven't done it for a while.  I suppose it is now or never!  Another project that needs interfacing.  I'm glad I bought it all on sale!
Halloween bag
Candy corn and Halloween green.  Ahh Halloween, you are so much fun!
Halloween basket
The gathering didn't go all to great but you gotta start somewhere.  I used a scrap of fabric from my last cross stitch project to finish off the top.
Gotta love making a useful item out of stuff you already have.  Currently I'm using it for cross stitch floss storage.   I will probably make more of these little puppies for each season.
Halloween basket
Hopefully that gathering thing will be better on the next try to make a taller, less shallow bowl.  To another day...

Sunday, September 25, 2011

Bag redo

I have this little bag that I made for my trip to Walt Disney World. 
Re purposed zipper
The old bag
It served it's purpose but I think it's kinda ugly.  I'm starting from scratch.
Re purposed zipper bag
Yeah, it's kinda ugly
I ripped out the zipper and that is all that will be left from the original bag.
Re purposed zipper bag
A re purposed zipper
I plan on ripping the pieces apart an putting them into another project in the future.

I looked through my scrap box.  I really need to organize that box.  What a mess!
Re purposed zipper bag
Mess-o-rama
 I really love greens, blues and teals.  I chose those colors and went from there.
Re purposed zipper bag
What I had in scraps
My two side pieces, looks much better.  I added some interfacing to make it less flimsy.
Re purposed zipper bag
Looking much better
The finished product
Re purposed zipper bag
The green side
And it's even lined!
Re purposed zipper bag
The blue side
Another little project done.  I love the outcome on this one.  This one might be my new coupon bag for the car or really anything else.  I love little bags and I love the ones I make even more!